‘Sign in With Apple’ has a huge advantage over its rivals: the possibility of hide our real email address when registering with any online service. Instead Apple creates a unique and random address for that service, so that we only have to discard it in case we do not want to receive anything else from that service.
But of course, not all services support this integration, so we can’t count on those random emails everywhere. For those cases, Apple offers you up to three ‘aliases’ in your iCloud email with which you can apply the filters you want. Let’s see how to activate them.
Let only a few know your real email address
In order to have those aliases, of course, you must have an @ icloud.com email address created. If you don’t have it yet, you can do it from the service’s own website by logging in with your Apple ID.
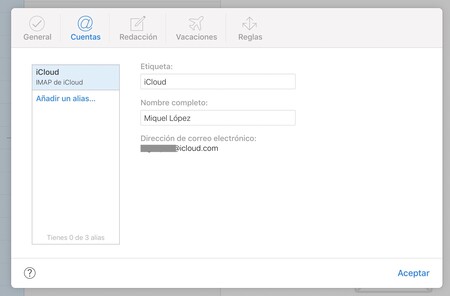
With this web address created, enter the iCloud mail web client through this link. There, at the bottom of the right sidebar, you will see the typical icon with the gear to enter mail settings. Press it, and in the window that opens, go to the ‘Accounts’ tab:

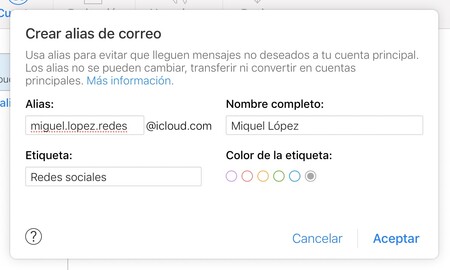
From this panel you can create up to three ‘aliases’, three email addresses that you can use to register for services where you do not want to give your original address. If you click on ‘Add an alias’ you will see all the available options:

You can organize each alias with a label (for example ‘Social networks’, ‘Newsletters’ or ‘Purchases’), and a color so that they are differentiated in the mail client. You can add and remove aliases, but you cannot change them and you cannot use them as an identifier in your Apple ID.

The advantage of doing this is that if you ever get fed up with the services you’ve signed up for with a certain alias, you can simply remove that alias. It is a good filter so that only give your authentic email address to whoever truly deserves it.
