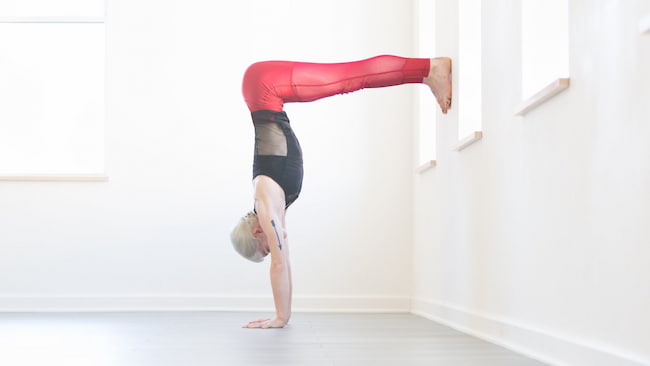
Benefits and Disadvantage of Handstands Against a Wall
1) If you are new to handstands, use a wall. Even experienced hand balancers find it helpful in getting used to the feel of balancing with the feet against a stable object. You will be surprised by how much easier it is to balance!
2) Use the wall as an intermediary step towards freestanding handstands.
3) Use the wall to find your balance point, one of the essential focal points in a handstand. We aim to have a little ‘weight’ as possible over our hands, and using a wall will help you achieve this!
4) An easy way to begin hand-balancing with no pressure on you at all!
5) Use it to play around with and explore your limits. For example, you can try taking one hand away from the wall and perform a one-handed handstand. Start small, maybe even four inches from the wall, and slowly remove more and more of your support until you find out how far you can go!
6) Handstands against a wall are great for training your sense of balance
7) It is a fantastic way to build strength. Just imagine how much work you have to put into kicking up on just two points instead of four! Not only that, but the difficulty becomes even more challenging when you try it with your legs turned out or straddled. You can also try kicking up into a handstand with one arm!
8) Train your sense of equilibrium. Try standing on different parts of your hands and seeing how it affects the pressure you feel in one hand. If you are struggling, try moving your feet closer to or further away from the wall. The wall can be used as a reference point to help you balance!
9) It’s just generally fun to play around with!!
10) Freestanding handstands against a wall are great for transitional practice into freestanding handstands. You can use the border to spot yourself when coming down, so you don’t crash onto your back/head.
Handstand disadvantages:
1) The biggest drawback is that you don’t get to experience all of the joys of having your feet off the ground!!
2) If you are more advanced, working against a wall for extended periods can lead to muscular imbalances. You tend to work more with one arm than the other (e.g., an ‘A’ frame handstand), and this can lead to a one-sided backbend.
3) When kicking up against a wall, you might find it harder to kick up with your legs turned out or straddled! If you are used to kicking up with your legs straight, you will probably struggle at first!
4) You can’t practice falling out of a handstand, which is an essential skill in all areas of balance training!
5) It’s complicated to get into a freestanding handstand from a wall. This is because your center of gravity is much closer to your hands, and you don’t have anywhere near as much momentum or power!
6) The wall can become a distraction, tempting you to look at it and check your alignment. It’s also impossible to have a prominent head if you know that the wall is there!
7) It doesn’t prepare you for full freestanding handstands, but rather handstands against an object (such as the floor, your bed, etc.). Therefore, if you want to practice a freestanding handstand, it is wise to work without anything under you for as much time as possible!
8) Having said all of this, balancing against a wall can help get used to being upside down. You may find that kicking up with your legs turned out or straddled is more accessible than practicing next to a wall.
9) It can be harder to spot yourself in the mirror when facing away from it, so it’s more challenging to look at your alignment. If you use a mirror when kicking up against the wall, try using one when freestanding too!
10) Doing handstands against a wall means that you only have the floor to push off from, which isn’t always convenient. If you are working on your freestanding handstand at home, it can become very awkward when you get stuck at 45 degrees!
Handstand benefits for the brain:
People who do handstands against a wall learn how to manage their fear.
Handstand benefits for skin:
Doing handstands against the wall allows you to work on your alignment at close quarters and improve your technique. In addition, this practice ensures that you are in good alignment, which reflects in your skin.
Benefits of handstands for the face:
If you have a ‘puffy’ look to your face, try doing handstands against the wall and see if it helps. This work can mimic inversion and encourage lymph drainage in the facial area, which smooths out wrinkles and sagging skin!
Handstand benefits for hair:
Doing handstands against the wall strengthens your neck muscles, which helps your hair grow healthier and stronger!
Benefits of Handstand Yoga:
Handstand yoga is a great way to learn how to get into a freestanding handstand. It gives you the experience of becoming comfortable upside down and trains your shoulders, hips, and wrists to work together to support you.
2) Once you can do a few seconds against the wall, practice kicking up with each arm at least once! You can even try doing one kickup with your right arm and then one with your left. This works your muscles in different ways and encourages balance.
3) Once you can do a few seconds against the wall, try kicking up to the side! This works your obliques and encourages the use of the small muscles in your core.
4) Do handstands against the wall with one leg straight and the other turned out. This is great for working on your balance, but can be challenging!
5) If you are still struggling to get into a freestanding handstand, try doing them against the wall. If you can hold it for 1-2 seconds it’s definitely worth practicing against the wall until you can hold it for longer.
Warnings:
1) If your balance is weak, try kicking up with your back to the wall rather than facing it. This gives you more support and less chance of falling!
2) If this method feels too hard or gives you too much fear, try kicking up with a spotter to help you! Your spotter can hold your legs or tell you when you are leaning too far.
3) If kicking up freestanding is giving you trouble, try lifting one leg at a time and holding it out in front of yourself for as long as possible. This exercise works for the same muscle groups as the freestanding handstand, but at a shorter range of motion.
4) If you are struggling to kick up against the wall or hold yourself up for long enough, consider practicing holding your balance on your hands with your back to the wall instead. This is less difficult than it sounds and can be helpful.
5) Avoid jerking your limbs up to get yourself upright. This may make your balance more tenuous and you will be less prepared for moving away from the wall!
6) If holding a freestanding handstand is giving you stress or anxiety, try working with a spotter or against the wall until you are ready to move on.
7) Don’t try these exercises if you have a shoulder or wrist injury. In that case, it’s best to work with a knowledgeable yoga teacher or physical therapist.
Chest to wall handstand benefits:
1) Builds strength in the upper body
2) Increases shoulder mobility and sword flexibility
3) Stimulates the thyroid gland (helps regulate metabolism)
4) Promotes better circulation throughout the body by opening up your chest
5) Stretches the shoulders, calves, arches of feet, and hamstrings (the muscles on the back of the upper leg)
6) Stimulates digestion and elimination systems in your body
7) Increases energy, vitality, confidence, and willpower
8) Teaches discipline because it’s difficult to hold a proper handstand for any length of time!