The most recent versions of macOS have a new tool with which you can record the screen of our Mac easily, something that we already explained how to achieve in a tutorial. But for those who want or need an alternative way to record that screen with certain extras, we can use another application that more than one regular on Twitch will know: Streamlabs OBS.
With this program we can broadcast live video on services such as Twitch or YouTube, although we will leave that main function aside and focus on what we want: to record the screen.
Assemble one or several scenes and record everything you want easily
You can download Streamlabs OBS for free from its official website. It is compatible with both Intel-chip Macs and M1s, and in the latter, its performance is good despite being under the Rosetta translation layer. All you need is to use macOS Mojave or later.
Once installed and opened, fear not: although its interface may seem complicated, this is an application that is easy to get the hang of. Being designed to broadcast everything is organized into “scenes” in which you can add elements such as the macOS desktop itself, your face from a webcam or various web sources, text, sound and video.
Therein lies the grace of Streamlabs OBS versus QuickTime: while QuickTime is limited to recording the screen, Streamlabs offers you do it with those additives So that recording lessons in which you appear speaking or want to show some data in the form of a document or additional text does not imply experience with a professional video editor.
You just need to think about any broadcast on Twitch, in which you not only see the streamer but you also see what he is doing on his computer, live chat, information in text, images … you can mount these “scenes” but thinking of recording your screen and not in broadcast it.
The first thing we will do is create our scene to record the screen. In the lower right corner of Streamlabs OBS we have the list of scenes from where we can create one by clicking on the ‘+’ button:
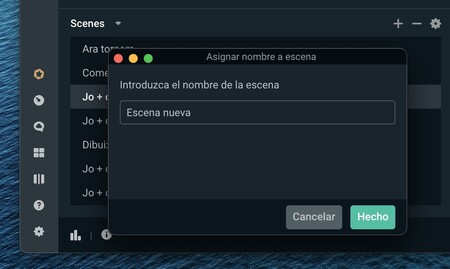
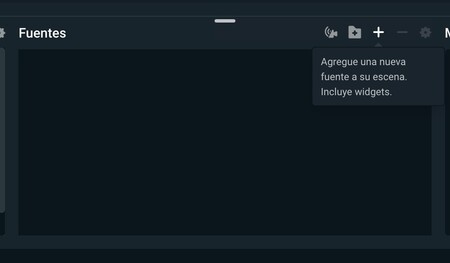
Give that scene whatever name you want and look now at the list of ‘Sources’ that you have just to the right, which should be empty. This is where, again with the ‘+’ button, you should be able to add audio and video sources such as the Mac desktop, the recording of your webcam, a text, an image, the microphone of the computer or some headphones or system audio:
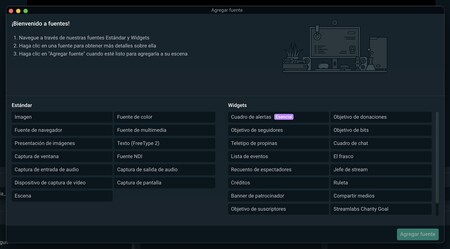
In the ‘Screenshot’ source type you have the option to add the macOS desktop, and in the ‘Video capture device’ source type you have the option to add what your webcam captures, so that after moving those sources to your liking you can have something like this:
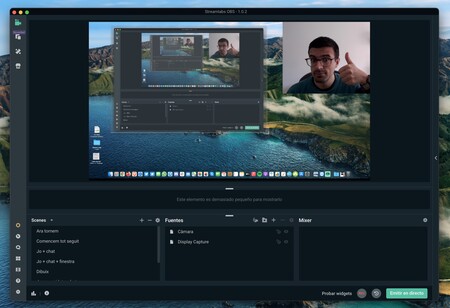
In the capture you see a ‘loop’ of video captures by having the Streamlabs OBS preview on the screen. If you move the application window away when recording, that effect disappears.
Remember that if you also want to record the audio, you must separately add the input source of a microphone that you have connected and separately the audio source of the system itself. Regarding the latter, a detail: it is possible that in the most modern Macs adding the system audio does not work by itself due to the security measures of macOS itself. In that case, the additional step of install a multichannel virtual sound card such as Blackhole.
What this utility does is give you the option to “redirect” the system’s audio source towards a virtual audio source that Streamlabs OBS and other similar applications are capable of detecting. It is free and also already has native support for the M1 chip.
Once you have completed all these steps, all you have to do is press the circular ‘REC’ button and start recording whatever you want:
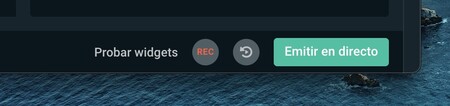
I insist: what you have to press is the record button and not the ‘Broadcast live’ button, since what we want is to record our own video without broadcasting it anywhere. In any case, the broadcast will not be possible if you do not first configure the credentials of a service such as Twitch to achieve it. It is not something that interests us for this tutorial.
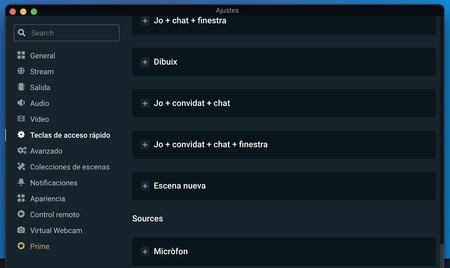
Note that you can create several scenes and jump between them as you record: Streamlabs OBS will create a smooth transition so that the video has good finishes. In the application preferences you can even configure quick keyboard shortcuts to switch from one scene to another in order to keep its window hidden without interfering with the recording:
The video will be recorded until you press the REC button again (note that you will have a timer that will indicate the duration of the recorded video). The resulting file will be saved in the Videos directory of your user folder macOS, in MP4 format.